Installation Guide
How to Install Your Wall Moulding Kit – Step-by-Step DIY Guide
Follow the steps below for a seamless installation experience
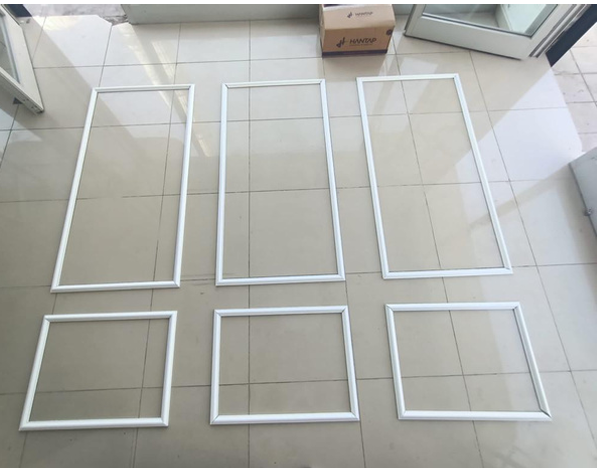
Step 1: Unpack and Organize Your Wall Molding Kit
Lay out all the pre-cut molding pieces on the floor.
If your kit includes numbered backs for easier placement (in large configurations), use them as reference.
Check the included wall plan to match each frame or panel to its position.
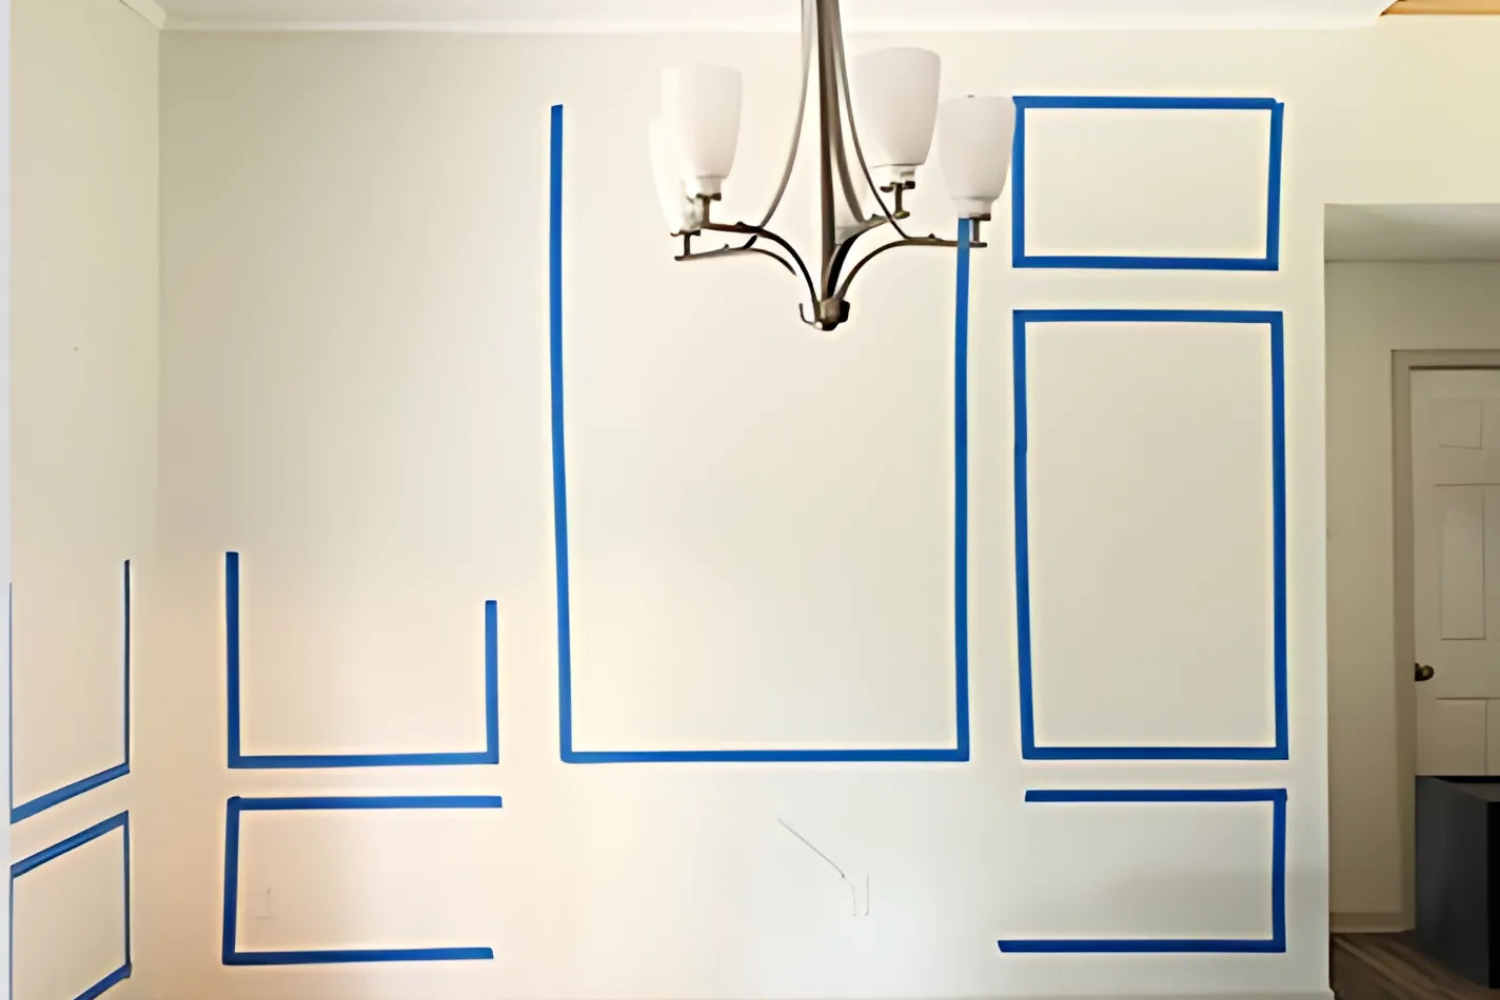
Step 2: Plan Your Accent Wall Layout
Make sure your wall is clean, dry and smooth. Use painter's tape to mark the placement of each panel or molding. Follow the layout plan provided and check alignment using a laser level or spirit level.
Determining the distances between panels in advance will make the process easier
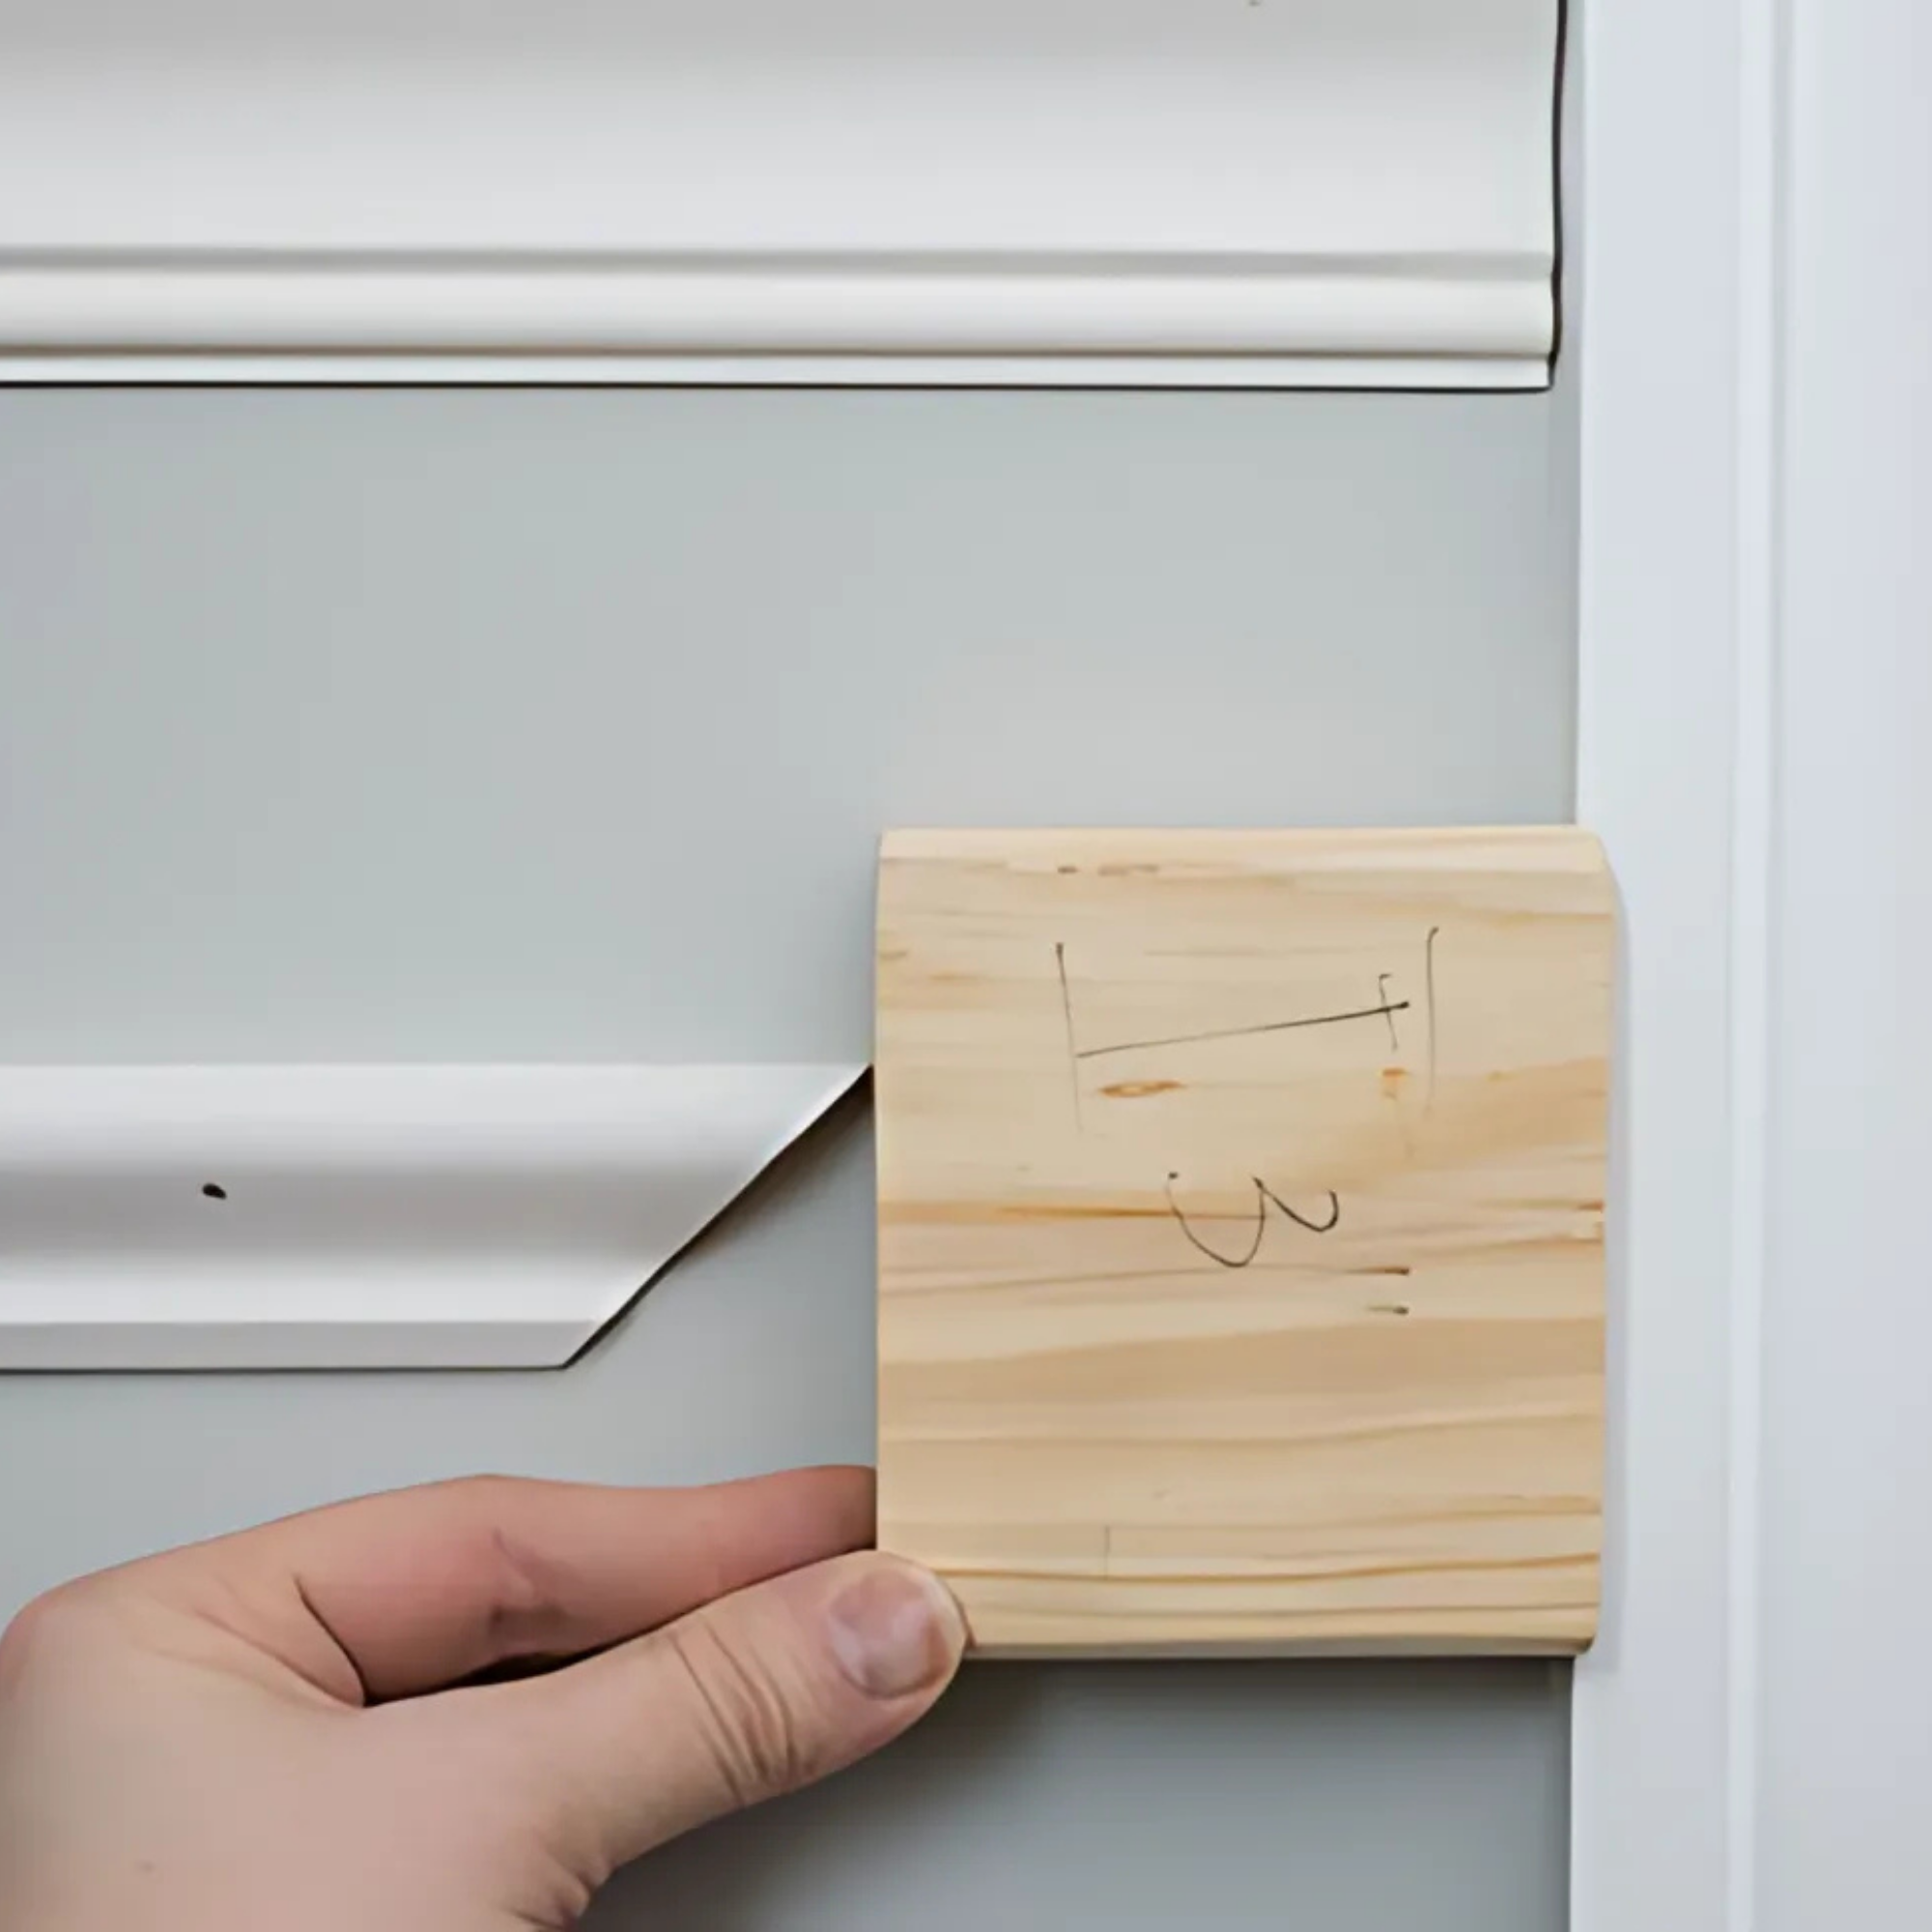
Step 3: Space Your Wainscoting Panels Evenly
Use a small wooden spacer or a pre-cut block to ensureconsistent spacingbetween each molding orwall panel.
This step helps maintain symmetry and visual balance across youraccent wall.
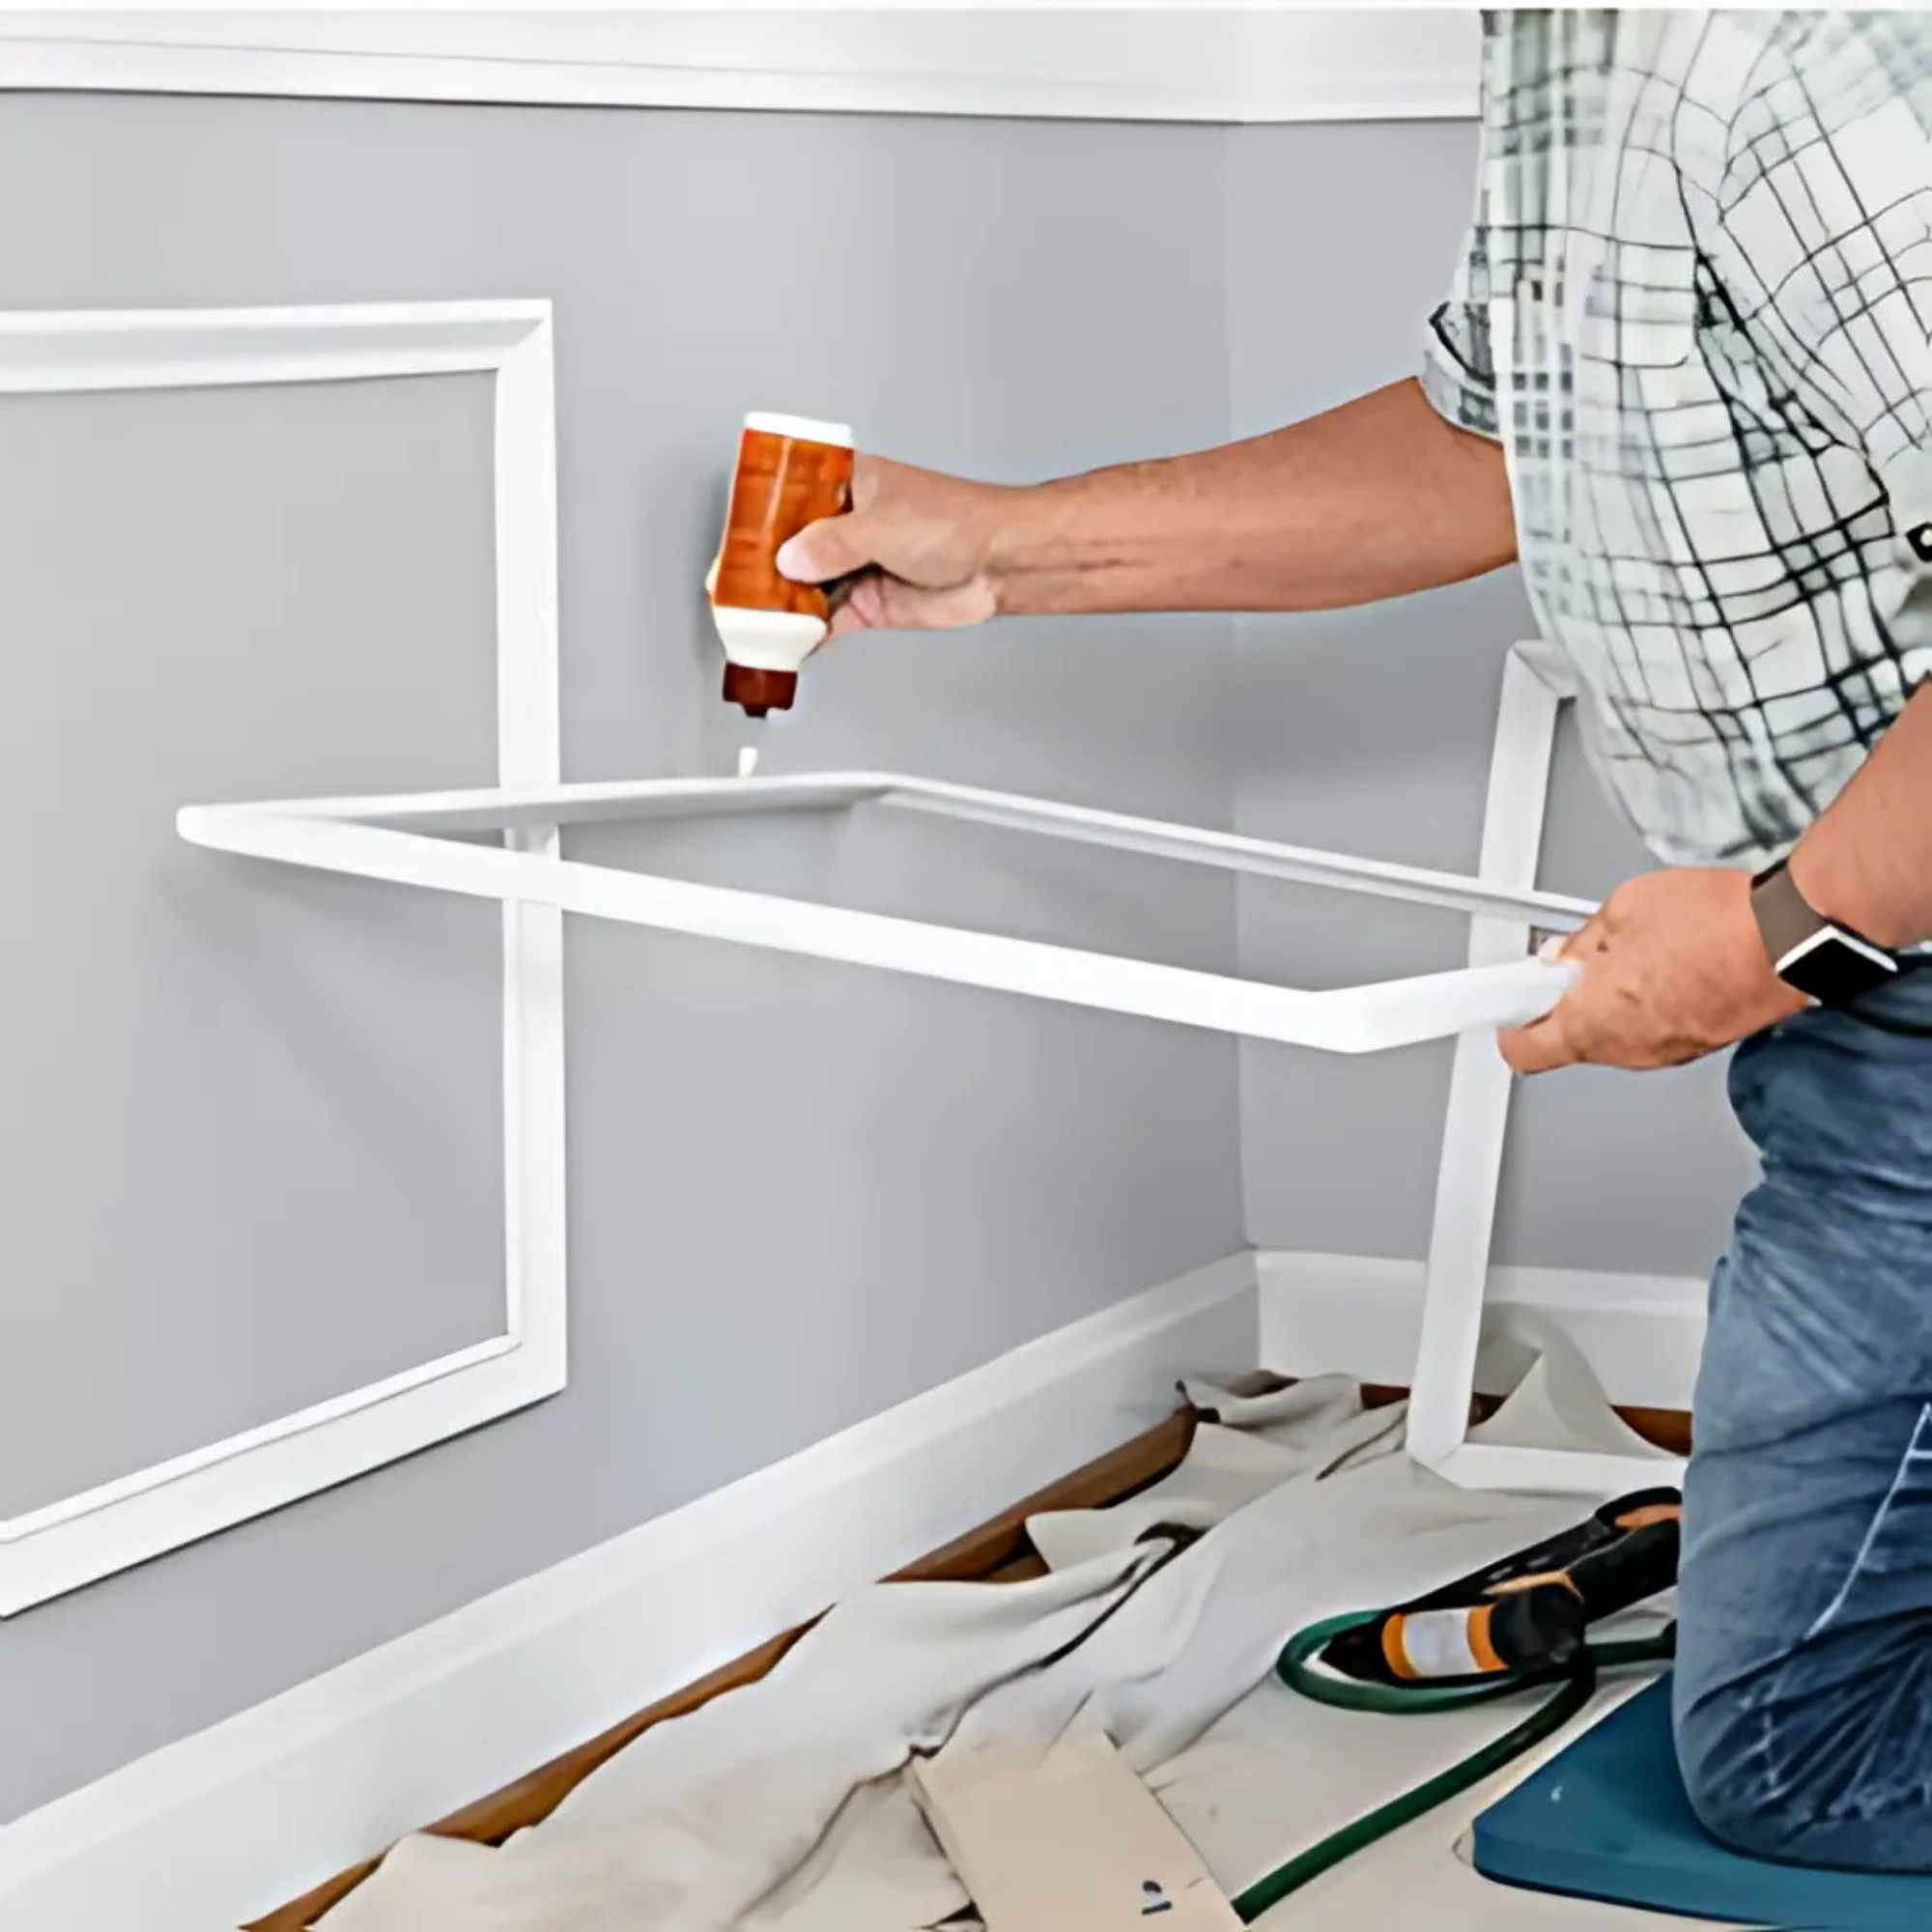
Step 4: Attach Your Peel and Stick (or Adhesive-Based) Wall Moulding
Apply strong adhesive (or peel and stick if applicable) to the back of each molding.
Start from one side, check alignment, and press it firmly to the wall.
Optionally, reinforce with a nail gun for added hold.
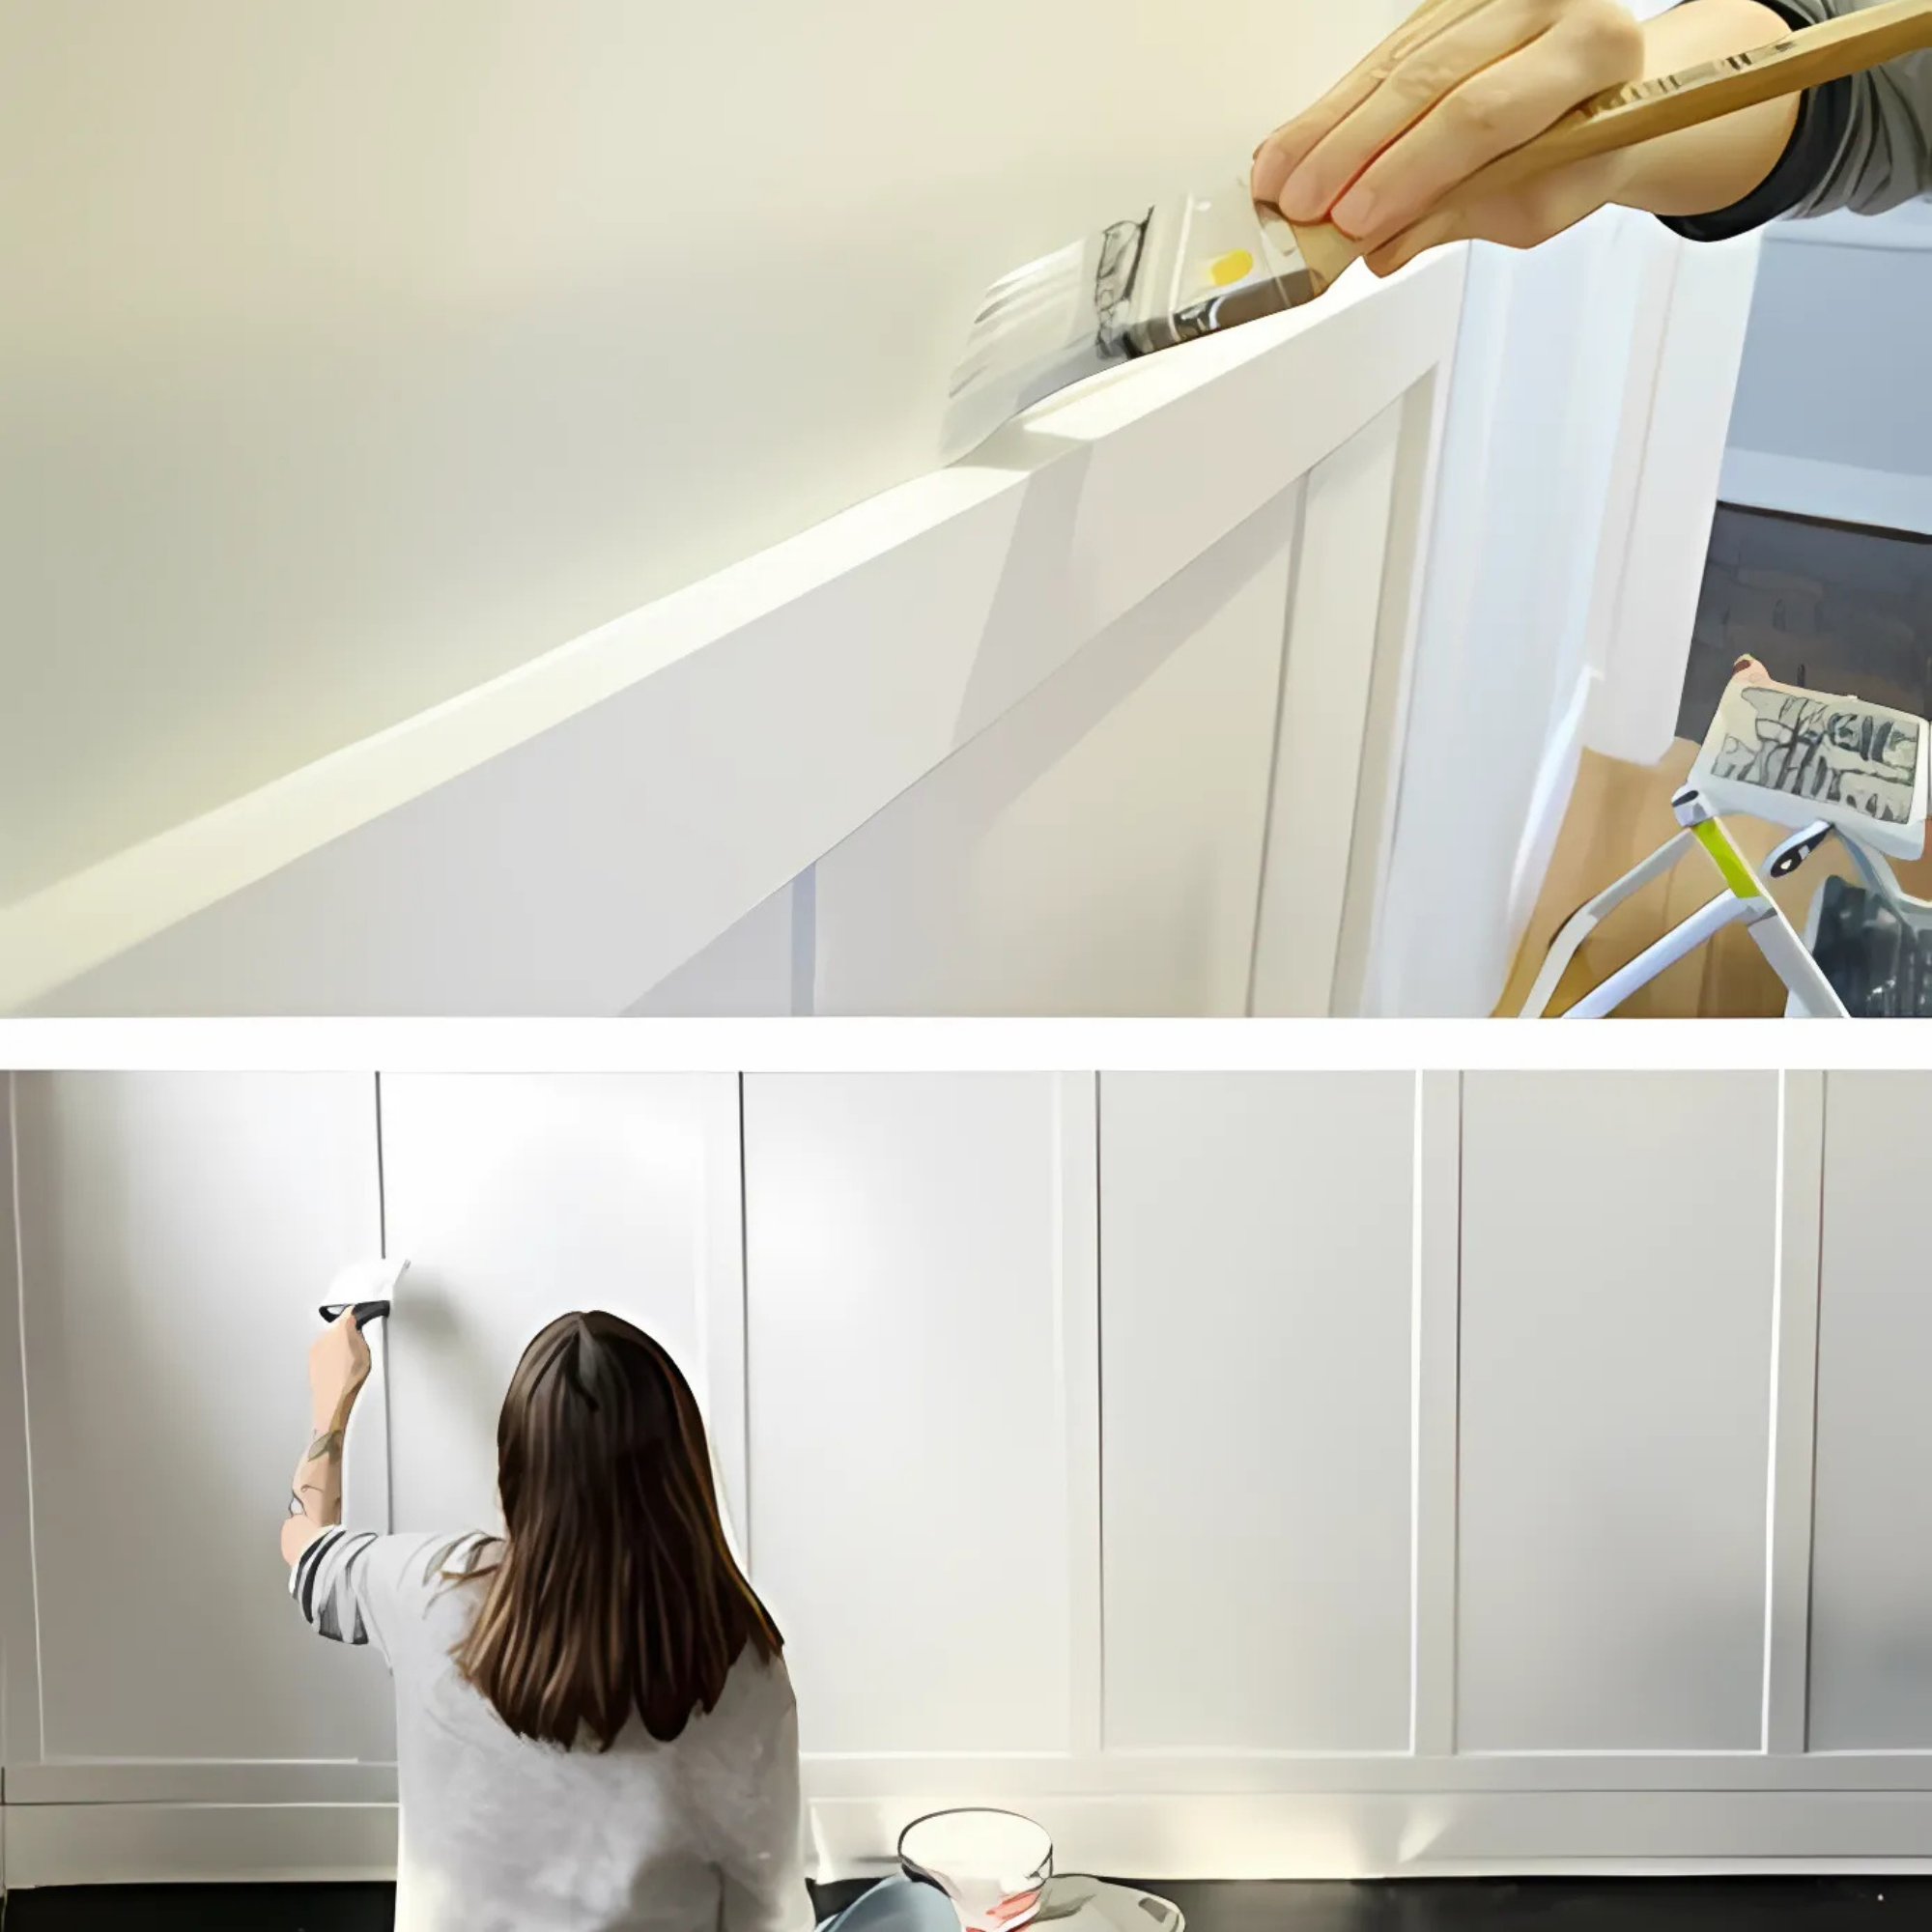
Step 5: Fill, Paint, and Finish
Use caulk or acrylic filler to seal any small gaps at joints.
Once dry, paint the entire wall (moulding and background) in your chosen color.
Ourwall mouldingsare factory-primed and ready to paint – no sanding needed.
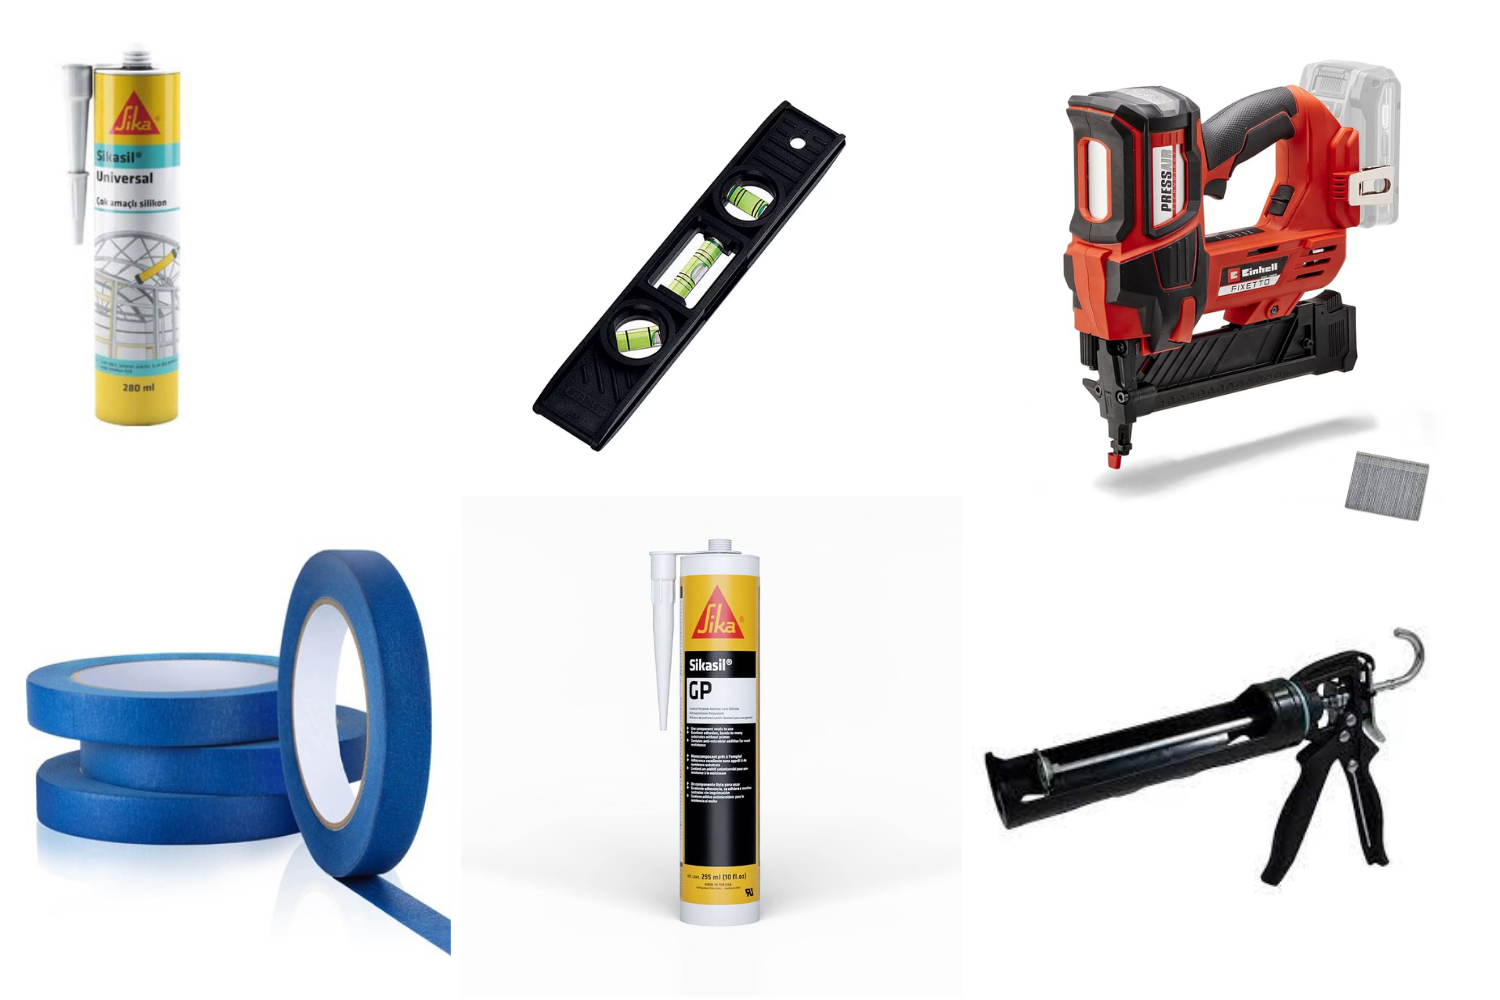
What You’ll Need:
- Adhesive (or peel-and-stick surface)
- Acrylic caulk
- Painter’s tape
- Laser or spirit level
- Paint + brush or roller
- Optional: nail gun